
The CNC Router that I purchased earlier in the year was to cover several purposes - create printed circuit boards, cut wood for cases and the like and also to cut front panels for projects.
There has been quite a bit of trial and error with the front panels. The material I use is a composite material that has several brand names - Signbond, Dibond to name a couple. As I've mentioned before it is a material the comes in several different thicknesses but I use the 3mm thick model. It is comprised on 0.3mm layer of aluminium, 2.4mm of pvc and another 0.3mm layer of aluminium.
So far I have used a few different cutting bits for the CNC router. When I got the CNC I first tried a 0.2mm engraving bit which I still partly use, I've tried a 0.2mm end mill to no avail - it is not strong enough to cut through the aluminium and I've also used 0.5mm end mills and 1mm end mills.
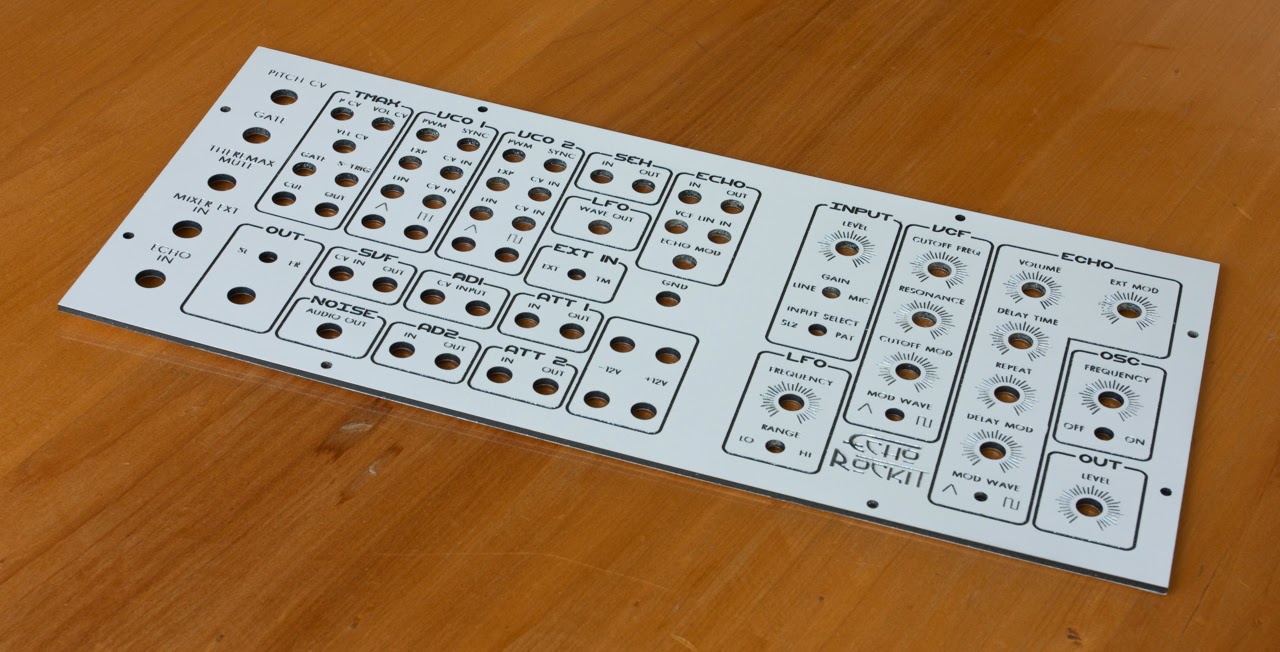
My issue was that I wanted to cut lines into the signbond that we less than 0.5mm wide which often worked with the 0.2mm engraver but I found that I soon blunted these engravers. So I have now come up with a reasonable but slow process. I firstly cut the lines to a depth of 0.2mm with the 0.2mm emgraver then I recut the lines with the 0.5mm endmill to a depth of 0.4mm. This works quite well and the resulted board was done with this method.
But why don't you just use the 0.5mm endmill you ask ? Well the issue with this bit is that the shaft of 0.5mm is not strong enough to cut a straight line. The bit moves around once the initial pressure has been applied and bit cuts through that 0.3mm of aluminium. This is why I use the 0.2mm engraver first because it partially cuts into the aluminium but more importantly it creates a track for the 0.5mm endmill to follow.
Mind you this process takes quite a while. The resulting board took about 12 hours to cut. I did this is several goes. I did the fine lines in one cutting session which took most of this time and then the 1mm end mill was used to cut the thicker lines and also to cut out the holes in the board.

The board ends up in quite a mess once the cutting has been done. I firstly vacuum off as much sworf as possible and then I sand off the panel with a sanding block. This manages to clean up any of the cuts that are a little messy. I vacuum again and then cleanup any of the cuts with a small knife. Once this is done I give the board a good clean with a light abrasive cleaner like Jif. This does a good job of cleaning the white board. Give the whole board a rinse under water and let it dry. The final process that I did on this board was to give it a few coats of clear sealant. I used a art based spray which is meant for sealing art works but it seems reasonably strong and flexible. I've not looked into something strong and more durable as I have the clear spray in my cupboard.
So the next step is to do the large Top panel. I've looked at some of the settings for the router and found that I can hasten the cut by changing a few values during the movements.
What I have learnt from this design is that I should aim to have larger text and larger lines which means making the whole design less compact. Although I've managed to cut this panel and I am happy with the final product, the time it tool to produce this final panel was about a week.
Any questions, please ask. Stay tuned for the Top Panel and then comes the wiring stage !!!